My first project planned for months.
When our family’s foot wears started flooding the house entrance, we felt the real need for an organizer.
The cabinets found in furniture showrooms were either small or expensive and also made of mdf material which
Would fail on hinges and easily get damaged out of the main door.
As a DIY enthusiastic got a spark to put my hands on wood working.
My wife encouraged the idea but wanted the rack to be built as soon as possible.
But as a beginner I need to gather lots of information regarding the material, tools, design, procedure.
Internet helped me a lot in learning about different materials, procedures and tools.
Still choosing the best for my requirement was a challenge.
My aim was to build it cheap with less tools.
As I am an engineer and CAD expert, was quickly able to do a 3D model of what I had in my mind.

Took a print of drawing with necessary dimensions and jumped on gathering the plywood sheets and started the wood working journey.
I really enjoyed every stage of my progression and to my luck with minor goofing, I was able to finish the project in a month time.

Had a lot of learning and experience in this project as I did a good amount of market survey on materials and finishing in my locality.
Which will be useful for my next projects.
Here is what I used and did for this project.
The material I used is ¾ inch plywood and ¼ inch plywood for the rear.
After joining the four sides by nailing them together added the rear piece too..
Used small “Bat” shaped stoppers to mount the shelves in an angle so that the lengthiest foot wear is accommodated.
Glued and nailed teak beadings to the exposed plywood edges and flush planned to the ply surface.
The doors were edge beaded too and made pockets to mount the self-shutting hinges.
Also drilled holes for lock and knobs.
After basic setting, removed all hardware’s and prepared to finish the project.
Sanded clean the surface and one coat of wood primer before I applied the Acrylic putty all over using the putty knife.
Leaving it to dry overnight and sanding the next day on my terrace was my evening activity for few days.
It was awesome to see all the surface white and silky smooth to touch.
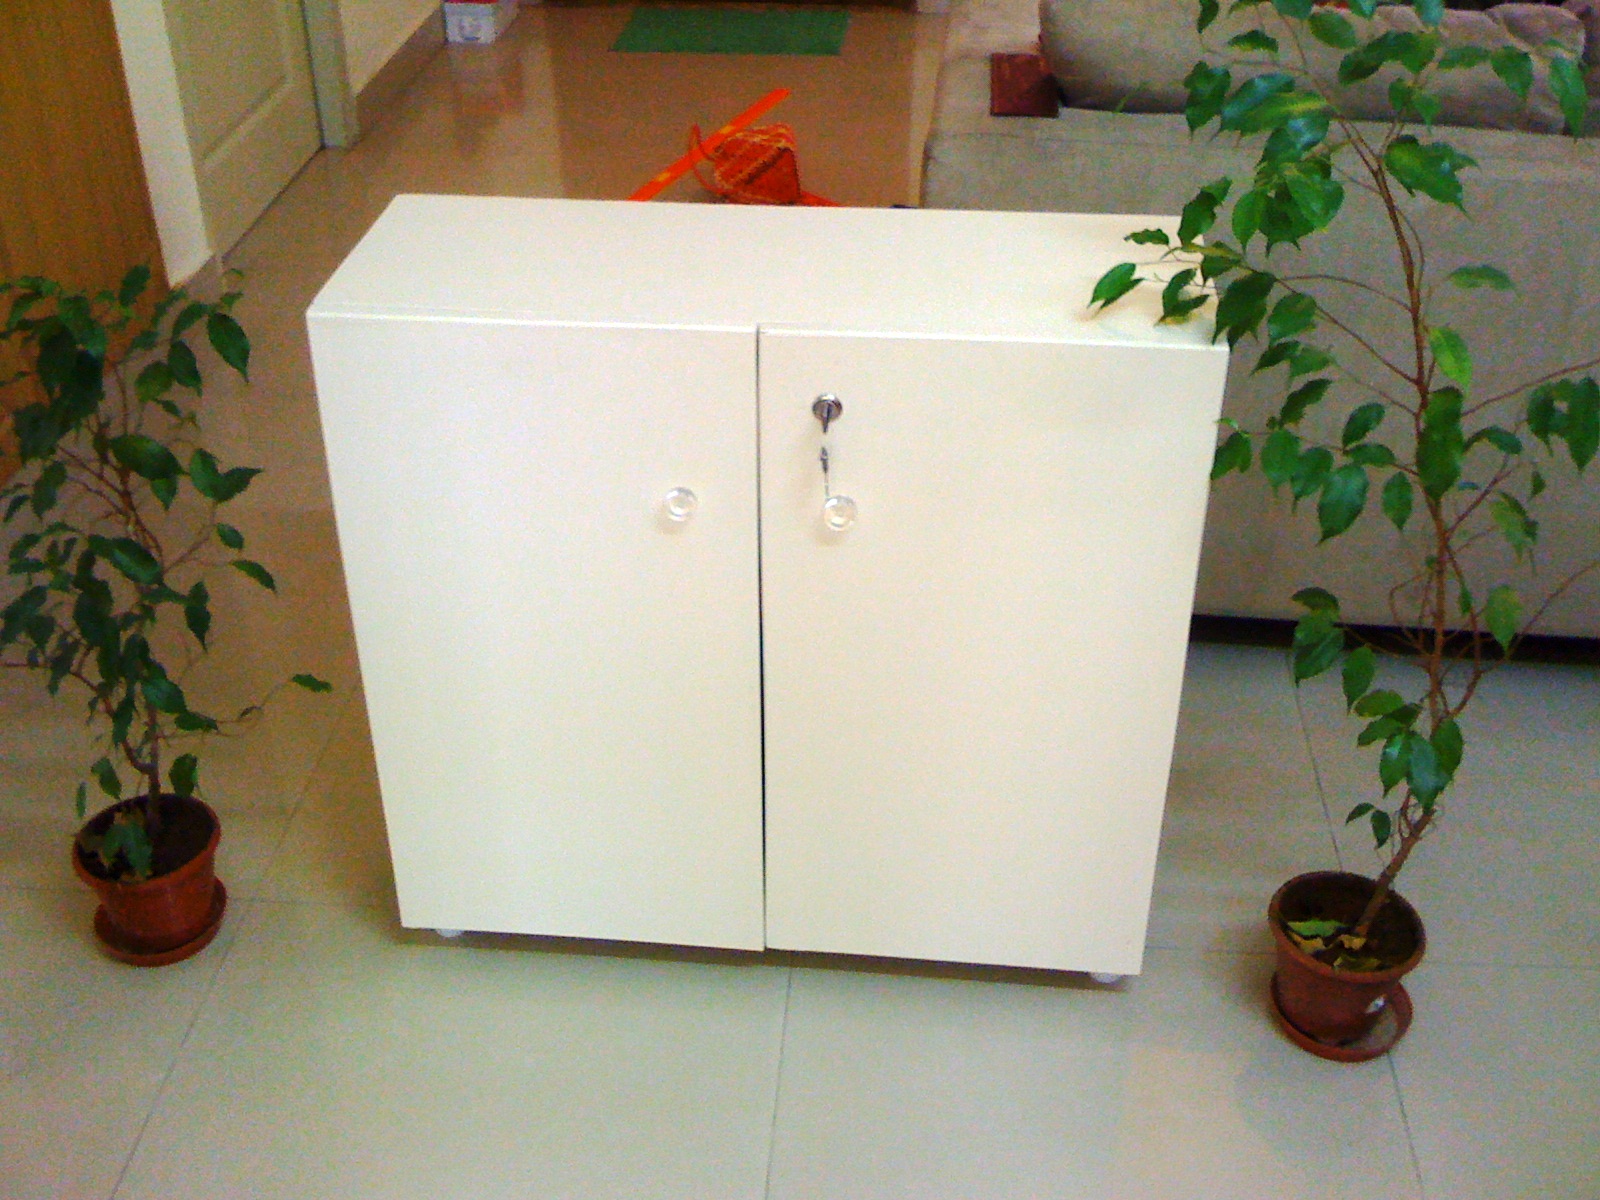
Finally it was time to paint.
Had a liter of matt finish cream color paint left over by my carpenter who did my interiors 4 years before.
The paint was good and sufficient to run 2 coats on the project.
From the day I put the Shoe rack in use, it greets me when I reach home and sends off me when I leave home ;)

Just love the feeling of making stuff….
Meet you in my next project.. until then please leave your valuable comments here.
When our family’s foot wears started flooding the house entrance, we felt the real need for an organizer.
The cabinets found in furniture showrooms were either small or expensive and also made of mdf material which
Would fail on hinges and easily get damaged out of the main door.
As a DIY enthusiastic got a spark to put my hands on wood working.
My wife encouraged the idea but wanted the rack to be built as soon as possible.
But as a beginner I need to gather lots of information regarding the material, tools, design, procedure.
Internet helped me a lot in learning about different materials, procedures and tools.
Still choosing the best for my requirement was a challenge.
My aim was to build it cheap with less tools.
As I am an engineer and CAD expert, was quickly able to do a 3D model of what I had in my mind.
Took a print of drawing with necessary dimensions and jumped on gathering the plywood sheets and started the wood working journey.
I really enjoyed every stage of my progression and to my luck with minor goofing, I was able to finish the project in a month time.

Had a lot of learning and experience in this project as I did a good amount of market survey on materials and finishing in my locality.
Which will be useful for my next projects.
Here is what I used and did for this project.
The material I used is ¾ inch plywood and ¼ inch plywood for the rear.
After joining the four sides by nailing them together added the rear piece too..
Used small “Bat” shaped stoppers to mount the shelves in an angle so that the lengthiest foot wear is accommodated.
Glued and nailed teak beadings to the exposed plywood edges and flush planned to the ply surface.
The doors were edge beaded too and made pockets to mount the self-shutting hinges.
Also drilled holes for lock and knobs.
After basic setting, removed all hardware’s and prepared to finish the project.
Sanded clean the surface and one coat of wood primer before I applied the Acrylic putty all over using the putty knife.
Leaving it to dry overnight and sanding the next day on my terrace was my evening activity for few days.
It was awesome to see all the surface white and silky smooth to touch.
Finally it was time to paint.
Had a liter of matt finish cream color paint left over by my carpenter who did my interiors 4 years before.
The paint was good and sufficient to run 2 coats on the project.
From the day I put the Shoe rack in use, it greets me when I reach home and sends off me when I leave home ;)

Just love the feeling of making stuff….
Meet you in my next project.. until then please leave your valuable comments here.
Great Blog !!!
ReplyDeleteYou have a nice collection.
Thank you so much for writing such a wonderful post about wooden shoe racks..
I have also good collection of wooden shoe racks....
Thanks for sharing such nice blog.
Nice shoe rack. well done Naveen.
ReplyDeleteBrilliant work dear friend
ReplyDeleteCan you please provide the details about the wood putty that you have applied? I am searching for this kind of putty for long time and every shop keepers is showing me Wall Putty of different variants.
ReplyDeleteThis comment has been removed by the author.
ReplyDeleteWe provide solutions to your daily convenience that to enhance your lifestyle.....Shoe Racks Manufacturer in Delhi & Household Product Suppliers in India
ReplyDeleteClear idea. Thanks for sharing your information.
ReplyDeleteOutdoor Furniture Chennai
Garden Furniture In Chennai
Outdoor Furniture India
Wooden Outdoor Furniture